The Arena Theme
The arena theme is made up of a series of set pieces which either don’t rely on cover at all, or rely on a much more rudimentary and haphazard form of cover. In the introductory sections of this book, I laid out the history of shooter design leading up to Half-Life. For most of that history, shooters used a style of design much closer to the modern arena style than to cover shooters. That is, the player and enemies were frequently thrown into a large room, and the enemies would slowly converge upon the player’s position. The player had to respond to these situations with lightning reflexes and constant motion. Half-Life and its multiplayer incarnations are, for the most part, not arena shooters. Still, the single-player campaign shows some of its Quake lineage through the arena theme. This theme is full of examples of hallways meant for kiting, large rooms meant for circle strafing, and lots of three-way fights that substitute crossfire-based chaos for cover.
There is not much in the way of over-arching organization within this theme. Most of the arena set pieces come after the beginning of chapter 11, and then with increasing frequency through the end of the game. Once the player reaches Xen there’s little cover, but plenty of combat, so naturally that combat has to take place in arenas. If I had to make the case for some kind of organization in the arena theme, I would say that the arenas start to get bigger in size, but only if you start measuring from the beginning of chapter 14. From that point until the climax of the game, the arenas mostly grow in size (to absurd proportions, eventually), mostly along the x and z axes, but eventually along the y-axis too. None of this is to say that the designers didn’t do anything interesting in the arena theme; there are many arenas which are interesting in their own right. Two of my favorites are set pieces 11-2 and 12-10; playing those, you can see where the Halo designers got the inspiration for many of their multi-sided set pieces and level designs. Furthermore, the arena theme actually exhibits a lot of the cadence structure that was developed by Nintendo in the early 1990s. I don’t think the Half-Life devs intended this, but I do think it shows another example of cadences in the wild, so to speak. Certainly, it helps to prove that the cadence structure is a natural form of organization in well-designed videogames.
As a last note, I want to say that there are many arena themes with some small amount of cover. For example, set piece 11-2 has a bunch of pillars which can shield Freeman from one angle of fire.
This is not properly cover as we saw it in the cover theme, because it doesn’t offer Freeman sufficient protection. Any advantage the pillars convey is neutralized by some other angle, or the charge of an enemy from a different direction. Freeman has to move constantly, and that movement is the hallmark of the theme. This is different from the temporary cover segment, in which the player has to keep moving to new cover. In that segment, Freeman can maintain cover discipline by switching between objects; the process is predictable if the player knows what to do. In this theme, there might be an aperture to use for cover temporarily, but once the enemy advances, it’s back to run-and-gun gameplay.
Half-Life is a transitional game. The designers had just invented modern cover, and so the distinction between cover and arena situations is sometimes a little murky. Usually, though, the player’s experience of arena set pieces is much different from the cover set pieces, however they may appear.
SET PIECE 3-1: Headcrab Elevator
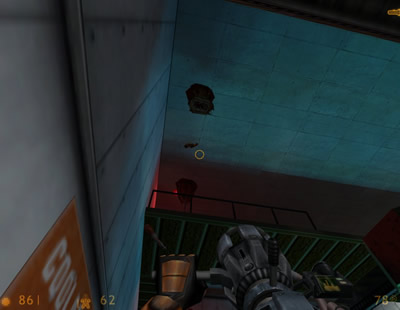
The arena theme begins with a very simple challenge: Freeman is trapped on a slow-moving elevator as a long stream of Headcrabs descends upon him. Up until this point, the player has been able to run around enemies, avoiding them completely or tactically engaging them in advantageous settings. Now, it’s impossible, and there’s no sneaking either; as the player is bound to the elevator platform. Of course, like any good early challenge, there’s barely any threat. Many of the Headcrabs will simply bounce past the platform, or jump off of it while trying to attack Freeman.
One nice thing about the descent the Headcrabs have to make is that it extends the amount of time the player can use to fire on them or dodge them. In this regard, it’s a great way to teach the player about how to deal with Headcrabs generally. The designers didn’t have to do anything special; they only had to rely on global physics already in place and drop Headcrabs from a greater distance to achieve this training-wheels effect. Also notice that the first arena set piece in this game also looks a lot like Space Invaders. The Headcrabs fall in a rate and pattern similar to the projectiles from the alien ships; this forces the player to move side-to-side while occasionally shooting. All that is missing is the cover.
SET PIECE 5-6: Yard Brawl
A great deal of content separates the first two set pieces in the arena theme. Almost three chapters later, the second arena set piece sees Freeman confronted by a large number of HECU troopers with relatively little usable cover. This is not to say that there isn’t anything resembling cover, because there’s actually a lot of that.
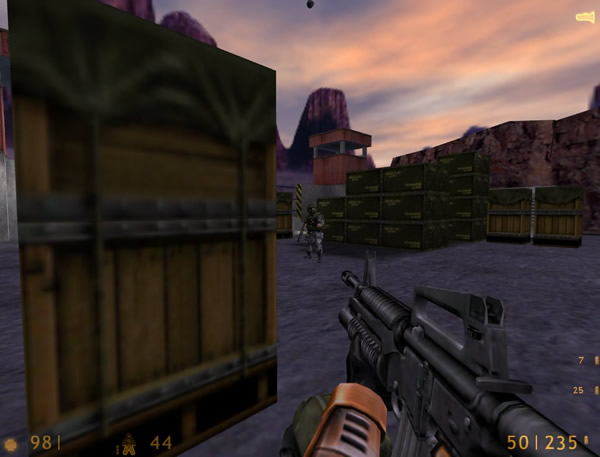
The problem is that the marines are scattered about this area such that any apparent cover will instantly become useless when the marines swing around it and surround Freeman, which they are unusually likely to do in this set piece. Once the battle begins, it’s going to be a stand-up/arena-style fight no matter where it takes place. Any “cover” will last only a few seconds.
Before the player obtains aggro on these troops, however, there’s an obvious and very necessary health machine on the wall. Once the player does gain the attention of the enemy, the HECU troops will charge right into the room.

Although there is something to hide behind, for an instant, it’s not the kind of cover that the player has been afforded recently. What’s more, the player may not yet have figured out that the HECUs will charge right around the cover and resume shooting. (Especially for the time, this was not a common feature of AI, and the HECU troops react and move much faster than most of the units in Quake or Goldeneye.) This fact makes this set piece a skill-check, where the player is forced into a do-or-die firefight with no options for escape. Because Freeman has just come up on an elevator, there are not even any long paths to use for kiting the enemy. A stand-up fight is the only real option.
For Half-Life, this is probably the biggest challenge yet. By this I mean that the game hasn’t exposed Freeman to enemy fire like this before. Up until this point, the player has faced the following:
- High-damage enemies, but with copious cover available (turrets, marines)
- Medium-damage enemies that appear suddenly, but move very slowly (zombies)
- Low damage enemies that move quickly (headcrabs)
- Platforming and puzzles
So the player’s ability to handle this sudden level of exposure is probably dependent on their exposure to other FPS games in which such scenarios were common. Players of Quake and Doom might actually feel more comfortable with this fight than all the cover-intensive situations that came before it. Circle strafing while taking large amounts of damage was, up until the release Half-Life, the norm. But purely within the context of Half-Life, this set piece serves as a wake-up call or spot check.
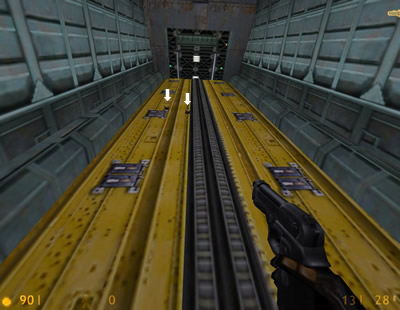
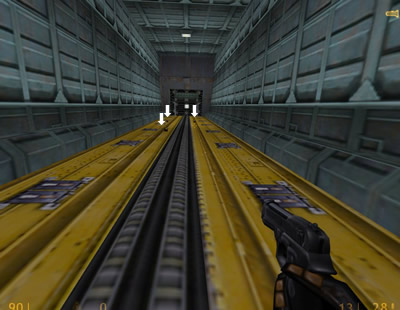
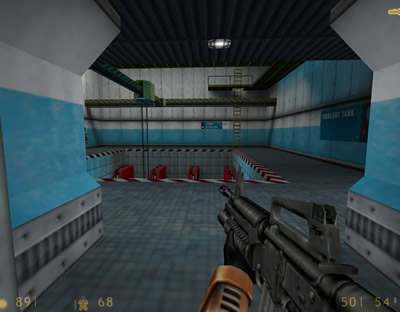
SET PIECE 8-6: Conflict of Interest
For this set piece, I’ll assume that the player does activate the trip-lasers in the tunnel that begins the battle. This will activate the two turrets located on either side of the cart track.
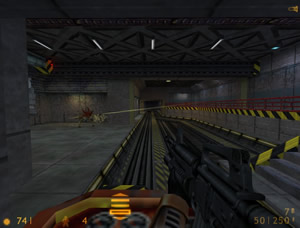
The set piece is fairly obvious; there are firing enemies in every quadrant, and Freeman can end up as the target for all of them. Despite being obvious, this setup is very strange. Chapter 8 is dominated by the cover theme, but there’s definitely an arena dynamic to this room. There’s no real cover, except for the wide aperture of the cart tunnel, so the player has to stop the cart completely in order to not get shot from every quadrant. Because the turrets and Bullsquids can choose any target, the action of this set piece can vary greatly, and killing the enemies in any one quadrant will greatly affect the overall flow of the set piece from that point onward, just as we will see in the arena set pieces later in chapter 11 and onward.
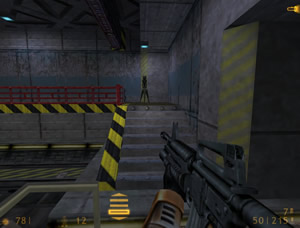
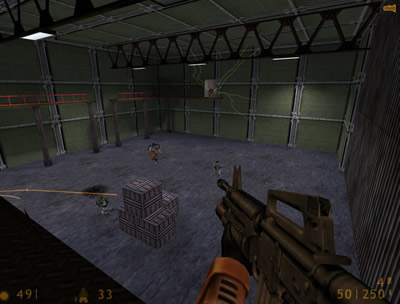
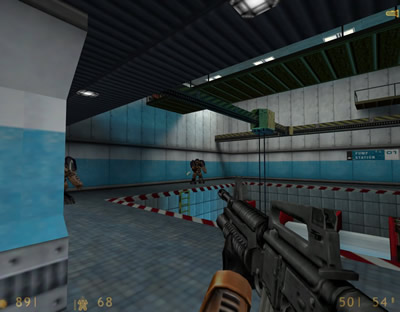
SET PIECE 11-1: Patrol
This short set piece serves as a kind of reintroduction to the arena theme, which has been dormant for the past few chapters. There's effectively no cover, although the player can, to some degree, cut the four marines into two groups that fire separately.
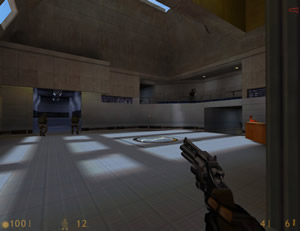
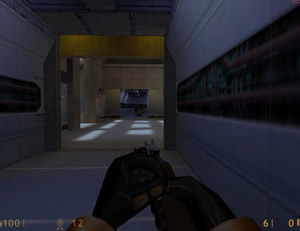
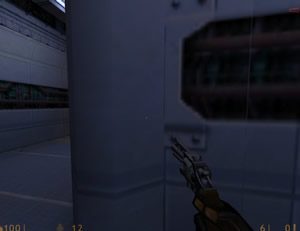
The crucial difference between this setup and those in chapter 8 is the lack of station-to-station cover. The player can hide Freeman around a corner, but the marines start charging as soon as they see Freeman, and there's nowhere to flee except down a long, exposed hallway. The player can use the lip of an aperture as cover, but the apertures are so wide that charging marines can surround and pummel him with fire. This is a great example of Half-Life showing its Quake lineage, as set pieces that might have been methodically dissected by a player dashing from cover-to-cover are instead turned into fast-paced brawls. Here, precision shooting and evasive movement (run-and-gun tactics) return from the past to show their usefulness in Half-Life.
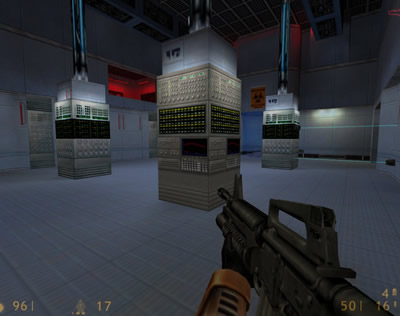
SET PIECE 11-2: Four Pillars
Although the arena hasn’t yet become common in Half-Life by this point in the game, set piece 11-1 disguises (or combines) its first arena as a puzzle. Freeman enters the arena via a large and normal door, with no enemies nearby. The room is filled with laser-mines, which are configured as a minor puzzle.
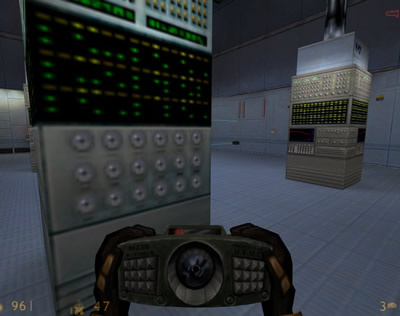
Because of the emptiness and spaciousness of the room, it’s tempting to simply shoot the mines and obviate the jumping puzzle. This is a typical Half-Life deception, however, as the detonation queues an attack from both marines and alien grunts.
The arena itself is probably the most Doom-like example of level design in the entire game. In Doom, a monster closet would open at this point and drop enemies all around the player character, forming a shapeless melee with no clear direction or order. In Half-Life, the players will note that there are three ingress points on two sides of the arena, and will be able to apply some of their own structure by using the pillars. In 1998, it was pretty likely that experienced FPS players would have stayed in the arena and fought it out with the grunts and marines. That’s what previous FPS games tended to be about, and it’s certainly a viable option here. Half-Life gives the player a thoughtful alternative to a straight up brawl, though, and in doing so (here and many other places) I think that it inaugurates a strain of new FPS designs typified by Deus Ex. (Obviously Half-Life came first, but we tend to see Deus Ex as the exemplar of this kind of set piece because it uses them so often, whereas Half-Life’s focus is elsewhere.) In this strain of FPS game, there is almost always an alternative to direct confrontation—an alternative not immediately apparent to players who rush in. This alternative is frequently more rewarding and less exhausting (in terms of HP and ammo) than direct combat, although it may take away from much of the run-and-gun thrill of the game. It’s always important that the designer finds a way to “speak” to the player about these situations, though—to tell the player that the alternative is intentionally designed into the game and ought to be pursued. The three ingress points of the enemies start the process, but the dead marine lying at the end of the back hallway is the real key. Beside him are three mines, and beyond him is an overlook.
This setup tells players who run into this alcove exactly what to do; even if they have to figure it out very quickly, it’s easy to sense the “suggestion” that the player use the mines and bait the enemies to come charging into them. This kind of communication between designer and player is pretty common in the game as a whole, but I think this is one of the more elegant examples of it.
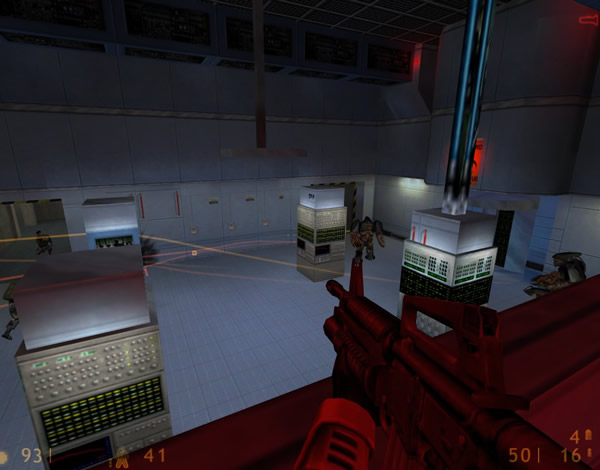
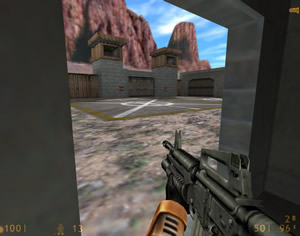
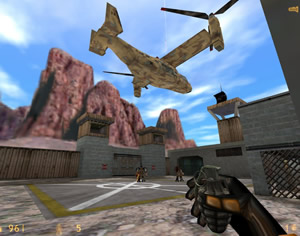
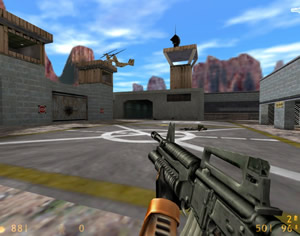
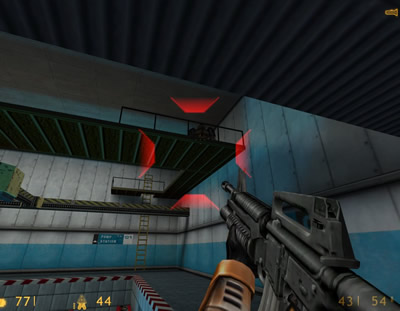
SET PIECE 12-10: Drop Zone
Chapter 12 gives us the purest arena challenges in the game. This challenge sends three alien grunts rushing out of a door to challenge Freeman. At the same time, a dropship swoops overhead and starts sending down pairs of marines into the fight periodically. Because there isn't really anywhere to hide, this set piece can get very chaotic, but that’s good thing.
The real and present potential for failure is an important part of action games. Indeed, the right kind of failure can make a game more fun, rather than less. This set piece manages to be pretty fun while also being deadly, and so we can glean some lessons from it. I'm going to list some characteristics of this set piece and how it kills Freeman when he doesn't succeed.
- The battle lasts a long time
- Death doesn't happen suddenly
- The battle changes every few seconds because of new marines dropping in
- The AI reacts dynamically, meaning every battle is different
The first two items are important because they mean that each attempt lasts for several minutes. In some cases, this can be a horrible thing; for example SNES and Genesis games tend to have problems with long encounters, for example. Long boss battles, especially those from the 2D era, were often brutal attrition matches that quickly wore out the player's patience. The reason players lost patience was that the boss battle proceeded in the exact same way through every death and repeat, and so the battle quickly grew boring. Moreover, in those battles, it often was the case that the player would lose a life because of one or two “last ditch” attacks right before the boss died. This meant endless repetition followed by sudden defeat which is not just exhausting but humiliating too. This brings up the second point: in this set piece, death doesn't happen too quickly. Freeman has to take sustained damage from several enemies to actually bring him down, and while that's likely in this set piece, it isn't fast and it isn't certain.
Because the battle will play out for longer than just one horrible moment, each experience of the battle will be different because of the latter two items on the list above. Obviously, the periodic appearance of two more marines will update the battle on a regular schedule. The marines arrive at the same interval over and over again, though, so they're not the principal cause of the dynamism in the fight; they're just a way of keeping that dynamism going. The real reason why the set piece is fresh on each play-through is the AI. The AI of each unit involved in the battle is autonomous and reactive, and as such, no two battles will go the same way. So all of the other things—the length of the battle, the relative survivability despite the total lack of cover, the constantly dropping marines—these things are all in place to support the dynamic AI which will make every play-through of this battle different. That's why it's okay if the player has to retry this battle several times; each time will feel fresh. And it doesn't even require specially programmed AI; it's just the standard AI that exists for these units all of the time. Good encounter design takes full advantage of the resources at its disposal, and this is a shining example of that.
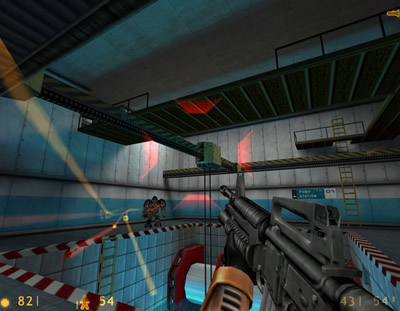
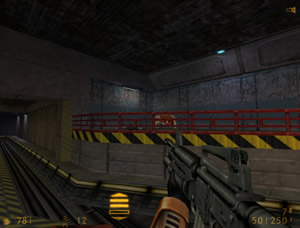
SET PIECE 12-13: Upon a Catwalk
This set piece derives its dynamic quality almost entirely from the composition of the enemies. Although there is a catwalk, and it is useful, the set piece becomes really dangerous if either the marines or the aliens who are fighting below get a clear upper hand. The aliens have an advantage at the beginning.
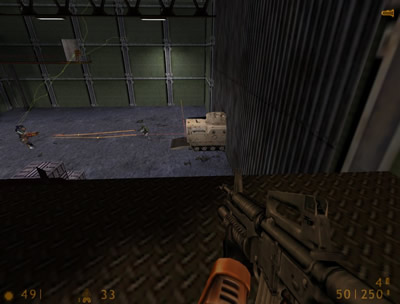
Even with the entrance of more marines via the APC, the grunts are too beefy and put out too much damage for the marines to handle them without cover and explosive munitions. Moreover, the placement of the marines seems to activate their movement jitter in a way that affects them adversely. While the player obviously has no stake in the battle per se, it behooves the player to take advantage of the distraction very quickly to get some shots in before either side is targeting Freeman. Failing to hurry means taking a lot more damage, because even the catwalks don’t serve as good cover for those heat-seeking grunt bullets. The only real problem I have with this set piece is that it’s impossible to know how the arena dynamic will play out before entering the room, and there aren’t many encounters like this one later in the game—i.e., there’s no time to learn the most obvious lesson this set piece teaches. That said, the increased speed of this arena and the next one help to train the player for their much more chaotic encounters in Xen, even if none of those later arenas have enemy infighting.
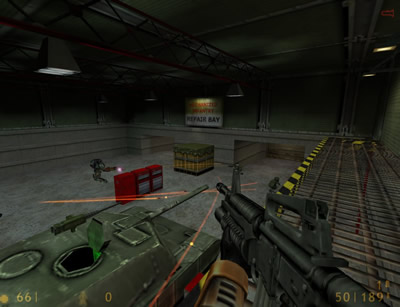
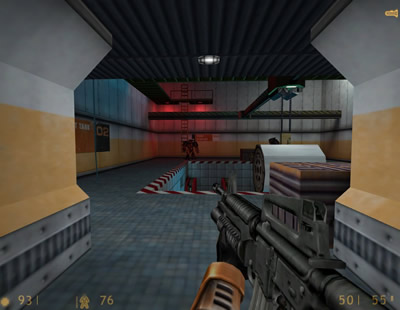
SET PIECE 13-4: Upon a Tank
This two-part set piece is quite similar to the last one in terms of enemy composition, and indeed shows some classical evolutions. The initial layout is the same, with Freeman entering from above on a catwalk. This catwalk is shorter and even more exposed than the last one, but it serves well enough as a platform from which to snipe a few enemies at the beginning of the fight. The big evolution comes when the player uses the tank to blow a hole in the far door after killing the initial group of enemies. Immediately after that, enemies start arriving by teleport in staggered waves and varying locations.
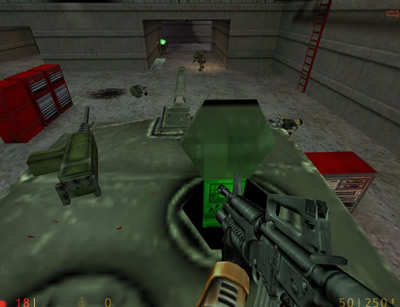
Either because of the shape of the arena or because of some unique AI script, these enemies charge extremely aggressively if Freeman hides behind anything. Some cover is present, but it’s totally useless. Instead, the player is apparently meant to use the machinegun on top of the tank to quickly eliminate these aggressive enemies, much like in set piece 12-12. The position on top of the tank does leave Freeman exposed, but the only other option is to run through the objects in the arena and waste a lot of ammo taking out the grunt. While arenas are made for movement, and the architecture here suggests it would be possible, this is unusually difficult. The lack of a third faction to draw some fire, combined with the unusually aggressive movements of the enemy aliens, makes the typical run-and-gun strategy inappropriate.
SET PIECE 14-5: High/Low Grunts
This is the first of three set pieces which deal with the same basic layout in different ways. The idea being iterated is a donut-shaped arena with three grunts placed in it. The arena is quite small, and so putting three alien grunts in the arena means packing a lot of damage into a small space. In this first iteration, all of the grunts are on one side and out of view. The approach to the room may telegraph the fact that there are enemies in it, but I doubt many first-time players are expecting the barrage that they get.
The aggressive movements of the grunts and their ability to fire homing bullets mean that Freeman is going to take a lot of damage very quickly. As before, each individual bullet doesn’t do that much damage, but because the grunts have so much HP, they’re going to keep firing for a while. In set piece 12-8, the presence of three grunts was mitigated by the presence of the HECU marines who distracted them. In this set piece, there’s no such distraction; it’s just Freeman and the grunts.
The only consolation is that it is possible to use the walls and catwalks for very slight cover, for one or two seconds. The approach to this set piece isn’t really an aperture as much as it is an entire hallway, but the wall and narrow walkway can be used to avoid taking damage from all three grunts at once. The corner also works as a decent chokepoint for explosive munitions or automatic fire, but that’s still not really cover in the sense of the term that the game has been developing. It’s only a very slight reprieve from one third of the encounter.
Similarly, the player can play cat-and-mouse from below the catwalk with the final, elevated grunt. The whole set piece, and the catwalk section in particular, are strongly reminiscent of Quake and Quake 2. Some of Quake’s most idiosyncratic moments in multiplayer come when players are shooting up or down through catwalks at each other; this set piece definitely recaptures the speed and intensity of that kind of encounter.
SET PIECE 14-7: Evolution of High/Low Grunts
This is another iteration of the idea of three grunts in a room. It’s also one of the clearest examples of how the CCST structure can be applied to Half-Life. In this case, the same type of room (donut arena with a catwalk) is now filled with more enemies and a different encounter design. Technically, this room is an evolution because it introduces a new type of enemy, instead of increasing the number of enemies already established in 14-5.
Want to read more? The rest of this section can be found in the print and eBook versions. In fact, the print version of this book has been significantly expanded and revised.
The Platform Theme - Back | Next - Non-Theme & Through Content