The Cover Theme Part 2
Segment 4: Deceptions
This segment, although short, does a good job of preparing the player for the climax of the cover theme that comes in chapters eleven through thirteen. One of the lessons we learned in Reverse Design: Super Mario World is that one of the most important things a tutorial can do is to condition the player to accurately sense danger. In any action genre, novice players can overreact to new stimuli and unnecessarily put themselves in even more danger. A good tutorial will condition the player to sense danger and take action appropriately, which is the first thing a player needs to be able to do in order to succeed at and enjoy a game. Half-Life does a fine job of this in its early stages and first cover segment, teaching the player about the speed and behavior of enemies as well as teaching cover discipline. The point of this segment, on the other hand, is to refine that cover discipline—to take it to a more nuanced level.
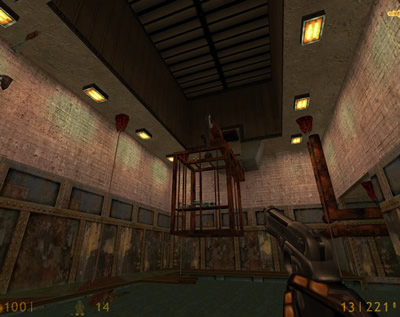
Before this segment, the player was mostly safe to wait in cover. In the previous segment, the player had to cross dangerous open spaces to get to cover, but it was fairly clear where the safe places were. In this segment, cover is still a safe place, it's just that what the player thinks will be cover isn't always actually cover. Take the first set piece from the segment: this cage looks safe, but it's actually going to drop into the water where an Ichythyosaur is waiting.
As it turns out, the cage isn’t what the player was expecting in terms of cover. There's another plunge in set piece 9-2, in which an apparently safe box-top is not a platform but in fact cover from the two Vortigaunts that teleport in.
The player ends up in a cover-based set piece totally by surprise, and has to figure out what to do with that cover once already there. Set piece 9-5, meanwhile, is not built upon total surprise as much as it is upon misdirection. The freezer's global damage effect makes it obvious that the player has to get through this set piece quickly.
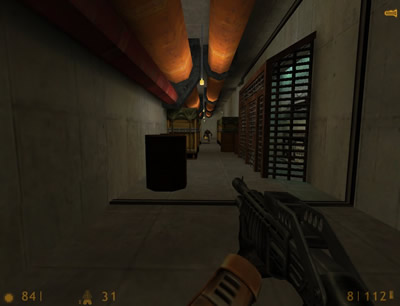
Again, there's plenty of cover; it's just that the set piece deceives the player about its use. This trend ultimately culminates in the introduction of the black-ops assassin in set piece 9-7. Here, the high mobility of this new enemy makes it difficult to know what is and isn't cover.
There's plenty of excellent cover everywhere in this set piece, but it's quite hard to determine which parts of it are useful, because the enemies here follow unusual behavior patterns and move frequently.
The goal of all these deceptions is to cause the player to think more critically about the use of cover—to think a step further into the future about cover and the disposition of enemies. In segment 1, the player saw the cover descriptor and followed it to the relevant cover, from which point Freeman could fire at the enemies in relative safety. Segment 3 introduced significant amounts of movement between described covers. This set piece gets the player to keep thinking after entering cover, and it does so by giving the player plenty of cover but then subverting its typical use. This is all to prepare the player for the climax of the cover theme (temporary cover and multi-front combat), in which the player will always have to stay on the lookout for the next piece of cover and the next tactical move.
SET PIECE 9-1: Ichythyosaur
This set piece offers a simple but effective deception. Coming upon the crossbow, the player will naturally expect to enter the cage and use the crossbow to fire safely down at the Ichythyosaur below. The setup seems like an obvious way to introduce a new weapon, and offers the ultimate cover: the enemy can’t even reach Freeman where he stands in the cage.
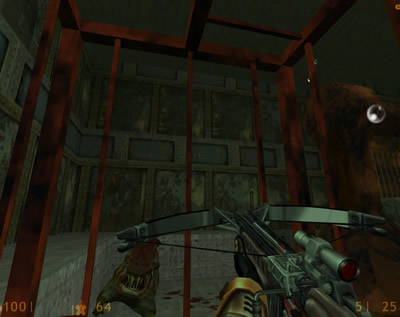
The cage plunges into the water, forcing the player to make a quick decision (which is the point of this segment). Does the player use the cage to shoot the Ichythyosaur to death quickly, or does the player try to get back to the surface before fighting? The cage is still effective cover, and it’s actually easier to aim at the giant creature from beneath the water. Either way, the decision has to be quick and calculated. The only real problem with this set piece is that it’s impossible to tell how much HP the Ichythyosaur has, and how many shots will bring it down. For players opting to use the underwater cover, this is a confounding element that simply doesn’t need to be there. In other circumstances, the unknown HP would not be a problem, but underwater, it’s just an unfair design decision.
SET PIECE 9-2: A Baited Trap
The deception in this set piece is small but central. The center box looks like a great shortcut across a room full of barnacles. Instead of wasting ammo killing barnacles, the player can actually gain ammo by jumping onto the crate.
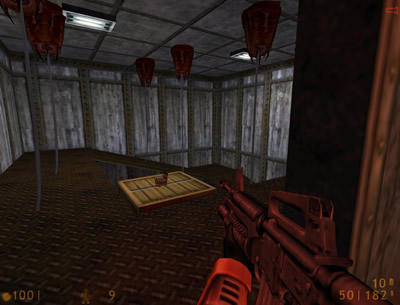
Making this jump, however, will cause the crate to collapse and two Vortigaunts to teleport in, blocking both exits. The box also obscures the player’s view, but it doesn’t hide the sound of those two Vortigaunts warping in. Just like the Headcrabs blocking the side-paths in the next set piece, this is a type of deception. There isn’t much real danger here, because the two Vortigaunts don’t have great firing angles on the whole room.
It’s easy enough to use the walkway or remains of the box to shield Freeman from fire. The thing the player doesn’t want to do is panic and start firing blindly or run into one of the barnacle tentacles while fleeing. As long as the player doesn’t buy into the deception, the set piece is easy, which is the whole point.
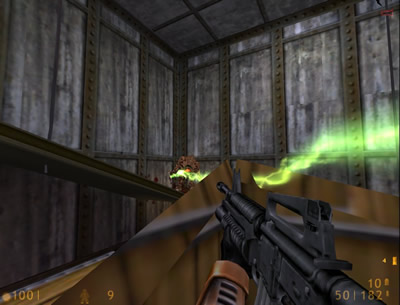
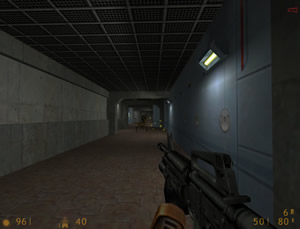
SET PIECE 9-5: Frostbite
This set piece brings back the forced haste of set piece 9-1, but this time around that haste takes a form that resembles this game’s Quake heritage. Rarely does the player have to truly “run and gun” in Half-Life as one would in Doom or Quake. Extensive cover, accessory spaces, laser trip-mines and enemy infighting are all alternatives to the kind of hasty strafing that made sense in earlier FPS games. Half-Life is a more methodical game. This set piece takes that away by having an ambient damage condition; Freeman will take damage from the extreme cold of the freezer.
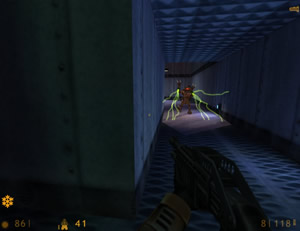
The ambient “cold damage” acts as the cover descriptor. Before this set piece, the best way to engage a Vortigaunt is to hide until it fires, then take advantage of its cooldown period, but there isn’t time for that. The player will naturally try to run around the enemies instead, using the pillars as cover. This is where the Headcrabs come in, as they block the near-side alley behind the cover. They don’t do much damage, but they’re not supposed to. Just like in set piece 5-1, the purpose of the Headcrabs is to cause the player to panic. This is a simple and brief (but incredibly effective) deception that shakes up what the player has learned about cover up to this point in the game.
The only problem I have with this set piece is that this wonderful inversion of the typical uses for cover isn’t developed more fully. It would have been nice to see a few more set pieces that involved a global damage constraint which forced the player to use typical cover in non-typical ways. Later on in chapter 17, this problem emerges again, when there are two set pieces with incredible potential that never see any development at all. There is no perfect game, however, and the biggest imperfection in most games is that they could have done more with the designers’ best ideas. This is one of those cases.
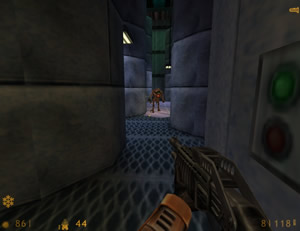
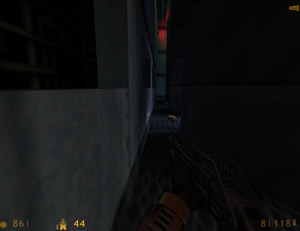
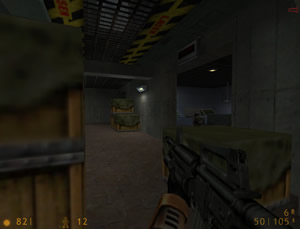
SET PIECE 9-6: Caterpillar Hallway
This is a short set piece, but one that advances the use of cover in a startlingly clear way. The setup seems simple at first; there are two Vortigaunts at the end of a hallway, and the cover is so clearly designed that it describes its own use.
The player can easily close the gap between Freeman and the Vortigaunts by ducking into any of the several niches that line the hallway. This is where the deception comes in. After the first two Vortigaunts are dead, two more will teleport in. One of them will be in front of Freeman and present little or no challenge, but the other Vortigaunt is directly behind him.
As was the case in the previous set piece, this trick is designed to make the player panic. The cover works exactly the same way for the last two Vortigaunts as it does for the first two—that’s the beauty of all that segmented cover. The player merely has to duck into cover to evade shots from two angles rather than one, which will become the norm in segment 6. The linear structure of the hallway and heaps of cover (and absence of alien grunts) keep it from being quite as difficult as those later set pieces.
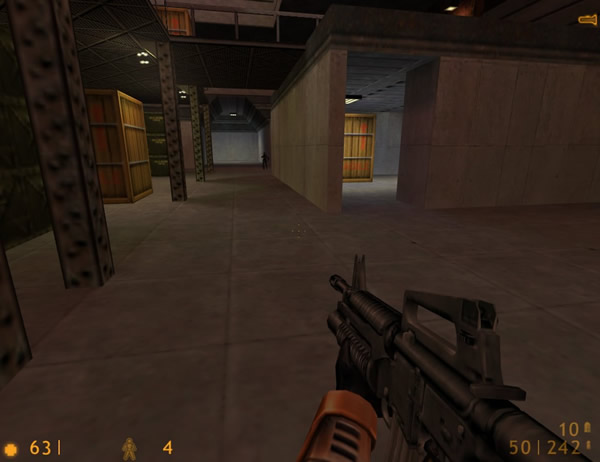
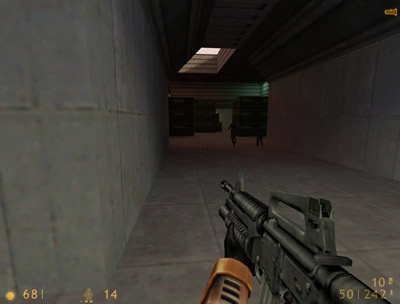
SET PIECE 9-7: Devil’s Playground
This set piece combines the primary design idea of segment 3 (cover-to-cover dashes in large areas) with the deception aspects of segment 4.
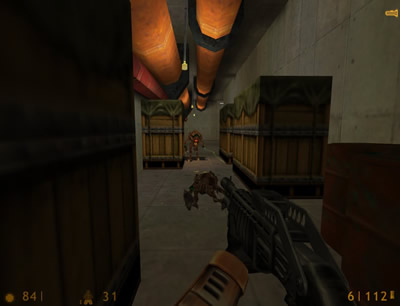
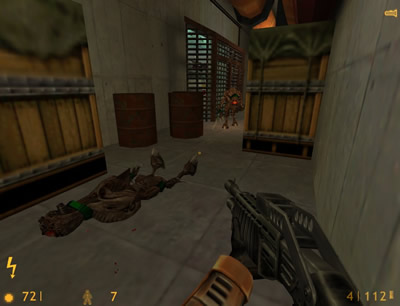
The black ops assassins here are unlike anything the player has seen, and their behavior includes an important deception. Most enemies in the game charge at Freeman or stay stationary to fire at him. The black ops assassin is highly mobile—but also flees from Freeman whenever he gets close, making spectacular flips between different heights in the terrain. It’s this fleeing behavior which accounts for the central deception of the set piece. The high mobility and slender frame of the black ops assassins makes them hard to hit at range. Charging up onto the elevated area ought to pin them down for easier fire. But the ability of the assassins to simply jump away means that all the health the player sacrificed while charging in was wasted, negating that strategy.
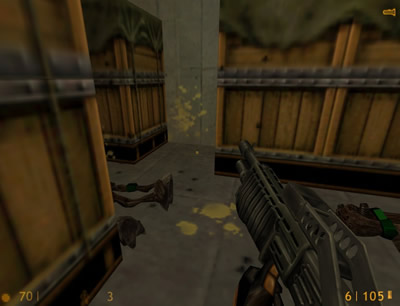
The evasiveness of the assassins makes the set piece and all the cover it provides considerably more interesting. This set piece might actually have the most cover of any in the game, in terms of the number of objects, with at least 25 pieces of individual cover, depending on how you count certain containing walls. The amount of cover is especially curious considering that the map is organized into a slightly irregular grid—it’s almost laid out like a modern city.
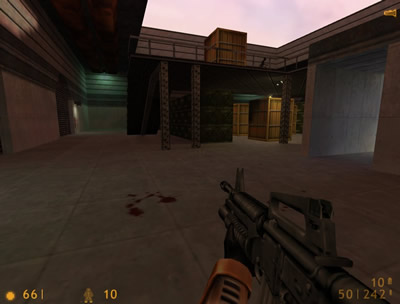
What tends to happen is that the player will sight and fire on one assassin, that assassin will evade, and one of the other two assassins will do twenty points of damage or so to Freeman. How is the player supposed to manage this set piece without having to merely fire grenades and bullets everywhere? The answer lies in the lessons of the first two segments. The lesson of segment 1 is to find the right cover to survive by using a descriptor. This set piece has a descriptor—it’s the sniper shot that kills the guard. The long range of the assassins’ weapons, and their hiding behavior are demonstrated by this shot, telling the player that Freeman should definitely be hiding behind something tall and solid rather than charging. The lesson of the second and third segments is to not merely hide, but to use cover and level architecture to dictate the terms of an engagement. In this set piece, the mobility, range and peculiar behavior of the assassins make it much more complicated than merely picking one or two angles. The player has to steer Freeman from cover to cover every few seconds as the assassins change their angles. This is why there’s so much cover, and why it’s organized in such an orderly way; the player doesn’t have time to worry about running into a surprise wall. The player’s concentration is taken up entirely with hunting the assassins around every corner, making sure to change angles all the time and never being cornered.
Interlude: Irregular Set Pieces
In chapters 11 and 12 there are a few set pieces that don’t fit a larger pattern in the design segments. When the designers were creating Half-Life, they probably did not intentionally create design themes and segments; these things evolved naturally. Some set pieces felt “right” when placed next to other set pieces, or the designers saw obvious connections between a few of them. Moreover, I doubt very much that all the set pieces were created in order; that would belie many of the things we know about set piece production. Even teams with exceptional communication, time and creative freedom (like the Valve staff had) would be hard-pressed to plan everything in their game out before making set pieces. Thus, thematically extraneous set pieces appear and we have to account for them.
SET PIECE 11-3: B-Teams
This set piece punctuates the otherwise arena-oriented eleventh chapter with an expansion/evolution of set pieces 4-3 and 8-2. Accessory spaces are back, and they're more numerous and more robust. The laser "puzzle" which follows this set piece provides cover for the many wandering enemies in these hallways.
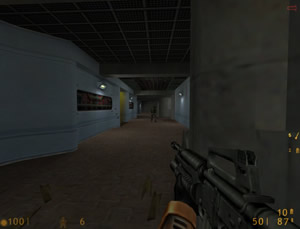
One of the interesting things about this set piece is its high variability. It’s almost like an arena dynamic except that there’s so much cover everywhere. The infighting between Bullsquids and marines can have very different results from encounter to encounter, and varies especially between difficulty levels. That said, it doesn't really matter who or what Freeman is facing; the same accessory-space strategy applies if the player is looking to avoid damage. The cover in each of the office alcoves makes up for the fact that the apertures are wider than in either of this set piece's ancestors. The width of the apertures can be problematic, though, if Freeman is on the outside of a room facing an enemy within it, although this isn't as common as the reverse.
SET PIECE 12-2: Chopper 1
This set piece seems like it almost might belong in the arena theme, but I don't include it there because it doesn't operate like an arena set piece. At first it seems like there's no cover, and there's definitely not the typical Half-Life kind of cover. The only thing that qualifies as cover is the large wall which can be used to obscure the distant gun emplacement.
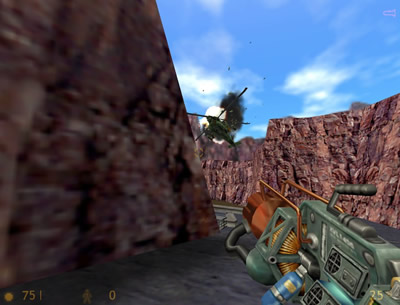
That bit of wall cover is completely essential, however, and very useful. The player can easily be shredded by the combined firepower of the gun and the helicopter, but with the wall allowing for some pop-and-shoot play against the gun while obscuring half of the helicopter's flight pattern, it's much easier. This is the kind of "cover" we might have seen in Doom, and it serves the same purpose. Replace the heavy gun and marines with some type of techno-demon, and this set piece might fit in an older game.
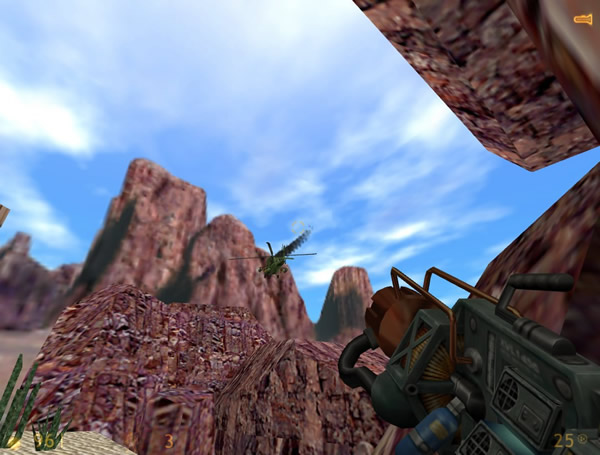
The only other thing worth mentioning here is that this set piece suffers especially from the big flaw in Half-Life bosses: the feedback when attacking the helicopter is unclear. The player has a hard time knowing how many hits the helicopter will take before dying. There's sometimes no clear indication that the helicopter is even taking damage when it's hit—a thin trail of smoke is the only sign the chopper is nearly dead, and it’s often hard to see at a distance. There's no reason for these feedback mechanisms to be unclear; even a few clear sound files and texture changes indicating hits and progressive damage would have been easy to implement to great effect. These things do exist in Half-Life, but they’re often (as is the case here) too subtle to notice during a firefight.
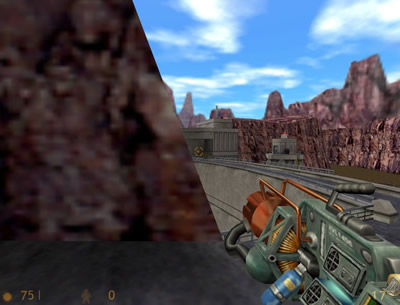
SET PIECE 12-3: Chopper 2
A direct evolution of the previous set piece, this encounter is much more in line with the kind of cover-based combat seen in the rest of Half-Life. The player has to face off against a helicopter, but with the advantage of cover.
Want to read more? The rest of this section can be found in the print and eBook versions. In fact, the print version of this book has been significantly expanded and revised.
Cover Theme pt 1 - Back | Next - The Platform Theme