The Cover Theme Part 1
Introduction and Structure
The cover theme in Half-Life is made up of seven segments, each composed of several set pieces. Each segment shows the player variations on a single idea. The first segment teaches the player how to use cover and features mostly obvious object-type cover (like crates, boxes, etc.) from which the player does not have to move. The second segment is similarly structured, although the cover is architectural rather than of the object type. In the third segment, the player is required to move between multiple pieces of cover. Whereas the first two segments generally allow the player to find a convenient piece of cover and stay behind it for a while, the third segment requires the player to shift between multiple pieces of cover in order to find the best angle from which to fire on the enemies. The fourth segment causes the player to shift between different pieces of cover by surprising the player with a variety of unusual enemy placements and enemy behaviors. The fifth segment goes beyond this, forcing the player to move from cover to cover constantly because that cover will often be destroyed or its protection negated by concentrated, high-explosive munitions fire. The sixth segment goes the furthest of all, and puts the player in situations where Freeman is surrounded on all sides, meaning that constant re-adjustments are necessary to take advantage of any cover at all. (There is also one final segment in Xen, but it consists of assorted ideas that are never developed.)
For convenience, here is a list of each segment and how it aims to improve/test the player’s cover discipline.
- Identifying basic cover (mostly objects), and staying in it.
- Identifying subtler architectural cover
- Moving between multiple pieces of cover to get the best angle on a set piece
- Reassessing cover quickly after a deceptive initial engagement
- Fleeing from temporary cover
- Fighting in cover while surrounded
- [Fragmentary] Moving cover, and cover which is itself dangerous
It's easy to see how the overall trend is towards greater danger and more movement between pieces of cover, but the use of cover never becomes obsolete. In each segment, we'll see how different features are introduced and fall out of use as the game goes on. The biggest two features are the cover descriptor and the practice of cover discipline. The cover descriptor is an introductory feature that tells players how to "read" the cover in a set piece. Usually the cover descriptor takes the form of a conspicuously placed object like a large box or laser beam. From the placement of this object the player can figure out how the entire set piece operates. Here’s an example of a cover-describing object, and then beside it I’ve put an example of how this would be handled in a current game.
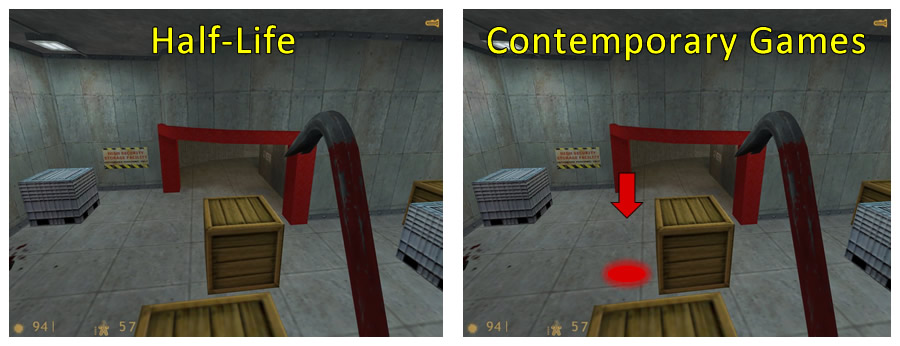
Of course, there are not floating icons like this in in Half-Life. In this set piece, a scientist and Headcrab are blown to bits, demonstrating the necessity of this piece of cover. We’ll examine a variety of cover descriptors in detail in the first two segments, but descriptors become more scarce and more abstract in later set pieces. Cover descriptors never disappear entirely, however, and we’ll see a few examples of their role in later set pieces too.
Cover discipline, on the other hand, is a skill that the cover descriptor helps to teach early in the game. Cover discipline is the ingrained practice of staying in cover despite the appearance of pressuring enemies or events, finding the best angle to fire upon enemies from and eliminating the closest and most dangerous enemies first. Cover discipline also means knowing when to back into the cover to avoid damage. Eventually, cover discipline comes to mean knowing when to abandon cover and move to the next piece of it because a grenade has landed or several enemies are converging on Freeman's position. At its most complex, the kind of cover discipline needed in segment 6 means always standing in the best location to take advantage of a little bit of cover while fight on multiple sides. Interestingly, there are a couple of set pieces in Xen which take cover discipline to new and strange places, but they don't do it in any regular way, and so don't constitute a thematically linked segment. Nevertheless, we'll see what cover discipline means when the cover is moving, or when destroying the cover means releasing additional enemies.
Segment 1: Basic Cover
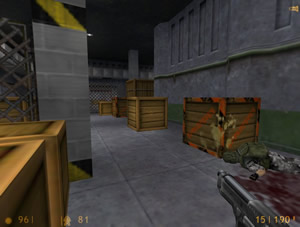
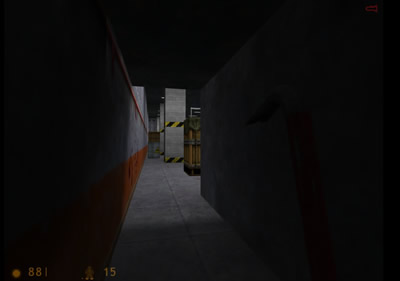
This segment is very simple, and is focused on merely teaching the player how to use cover. In 1998, cover of the kind that Half-Life was offering would have been completely novel, and its use would have seemed alien to anyone who had grown up on the arena shooter. Thus, we see many instances of the game telegraphing the direction and quality of fire before the player even has to enter the set piece. Cover in this segment is almost always in the form of large, obvious boxes. Most of the enemies in this set piece are static turrets that, while highly damaging, do not move and cannot charge Freeman’s position to negate his cover. In the middle of this segment, the designers use teleporting enemies to try and force the player to break cover discipline, but none of the teleports are terribly threatening on their own, usually consisting of one enemy. The goal of these teleports is to teach the player not to panic, which is one of the first and most important lessons a game can teach a player.
SET PIECE 4-2: Cover!
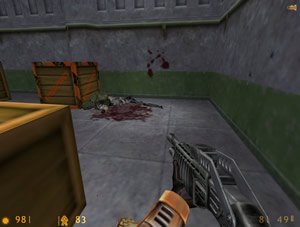
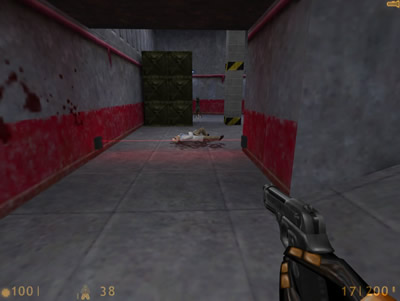
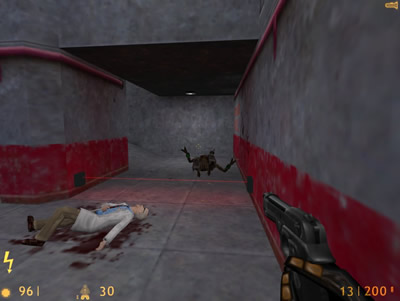
The cover theme begins with a simple exercise in obvious, one-directional fire and one type of cover. The source of the fire is an automated turret that puts out a lot of damage and isn't immediately visible upon entering the set piece.
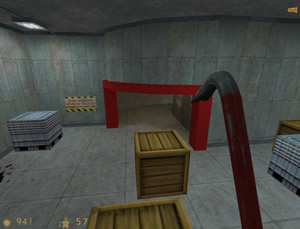
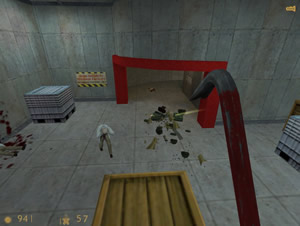
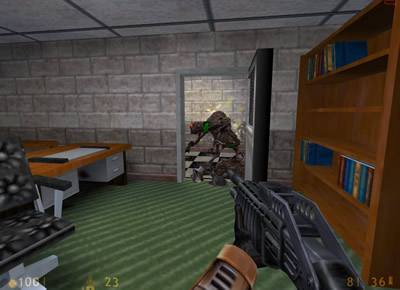
The designers do a great job here of alerting the player to the danger here with two elements that control the player's movement. The stopping mechanism is the vertical drop out of the crawlspace which will probably cause the player to pause long enough to see the scripted sequence (the scientist and Headcrab being messily shot to pieces) which is the cover descriptor. The only really difficult thing about this set piece is that it's a little hard to see the layout of the cover from the vent aperture. The player has to either run clear across the set piece into the safe zone on the other side, or drop and duck immediately behind the right-hand cover. Either move is a kind of "leap of faith" that first-time players might be reluctant to take. Taking the leap will teach the player something very important about the use of cover: that enemies don't start shooting immediately. This is one of the facts that make the use of cover possible. Without that important delay, jumping out of cover to move or fire would be impossible, and players would be paralyzed.
The other apparently difficult thing about this set piece isn't a difficulty at all, but rather a constraint that helps to teach the player about using cover. The turret is essentially impossible to kill at a distance, and it's pretty obvious that trying to fight it is a bad idea. The only real option is to use the cover to hide from it. This is ideal, because it forces new players to focus on their hiding rather than their shooting. The combination of hiding and shooting will come later. As a reward for players who figure out that some of the cover objects are moveable, there's a panel allowing the player to disable the turret beneath its platform, and a health station above. This is an ideal example of "bonus goals" because it's totally in keeping with the theme of hiding rather than fighting.
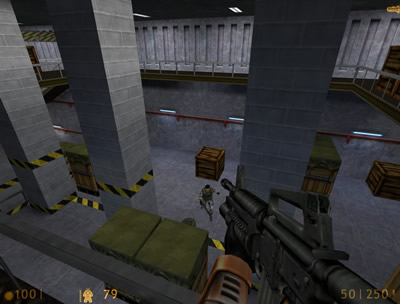
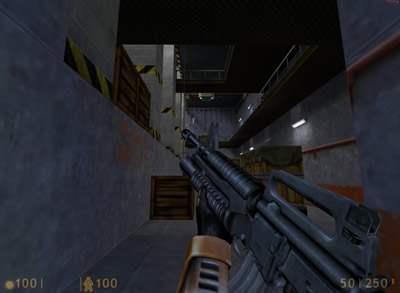
SET PIECE 4-3: Office Combat
Although the Vortigaunts in this set piece do move and will charge at Freeman, they still don't require the player to do that much moving. The many offices in this section of the level serve perfectly as accessory spaces. An accessory space is an empty room with a narrow aperture that gives the player a perfect location to engage enemy units. (The best one here is marked “AC” on the map below.) The rooms are so handy and so obvious that they serve as their own cover descriptors. The player simply draws the aggro of the Vortigaunts and then parks Freeman in any of the several spaces indicated below.
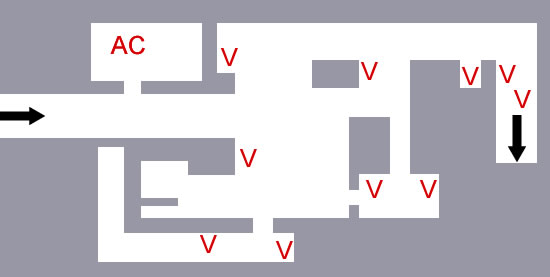
The Vortigaunts will line up perfectly in these narrow apertures to be shot. The player doesn't have to do that much backtracking because there are so many good spaces designed right into the architecture. While the cover here isn't made up of the same boxes as elsewhere in the segment, it's nevertheless obvious that these rooms and narrow apertures can make it easy for the player to stop and fire on groups of disadvantaged enemies.
SET PIECE 5-1: A Sleeping Turret
Here we have our first look at the puzzle aspect of cover and the first good example of a geographic cover descriptor (rather than a script which performs a revealing action). The turret in this set piece starts in a dormant state and is alerted by Freeman crossing the laser tripwires. The turret will immediately spring to life and start depleting his HP rapidly. The aperture for the room is too wide to use for cover; what does the player do?
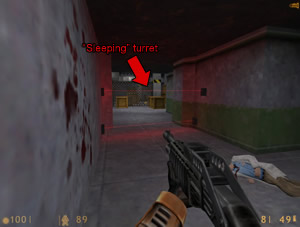
While it's technically possible to slip through the trip-lasers without detection, most new players aren't going to accomplish that feat. Instead, the player needs to quickly form a plan of how to get into cover, and where to go after that. The descriptor that tells the player how to do this is the shoot-through lattice highlighted in the screenshot. This screen won't stop bullets, but because it's connected to an obviously impermeable pillar, Freeman can't walk through it. The pillar on the right shows us exactly where the impermeable screen stops. The plan starts to spell itself out after this: get to the first box on the left, and then slowly move Freeman around the turret counter-clockwise.
It's not until after the player has a tentative plan that the designers start throwing in complications. The first big complication is a series of Headcrabs that teleport in one by one once Freeman has reached the second (right) cover boxes.
This is just the designer's way of teaching the player not to panic while in cover. This is a fundamental concept the player needs to know about cover. Standing and running will result in damage or death, especially since the next box ahead is actually an explosive crate, but staying relatively still will result in the turret shredding the Headcrabs as they overleap a crouching Freeman. This is a lesson that the player needs to know, and which this set piece teaches well: don't panic. The nature of cover is that it allows the player to wait for the right moment; rushing will only remove that advantage.
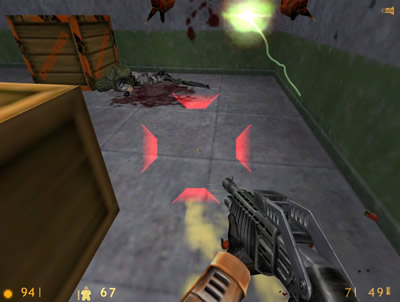
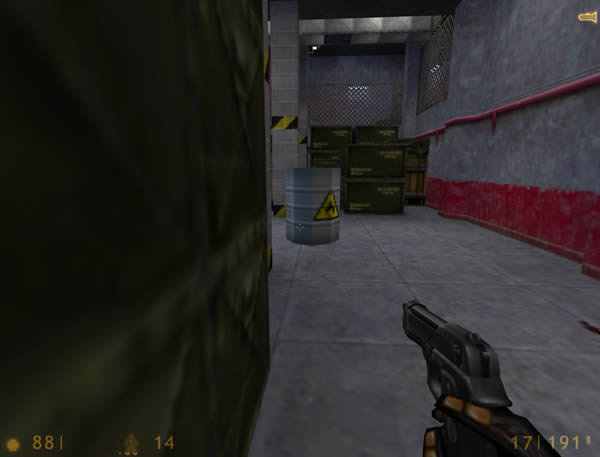
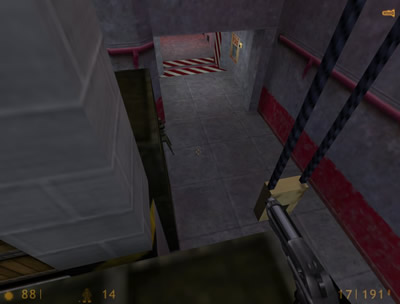
SET PIECE 5-2: Turret Evolution/Expansion
This set piece is a typical evolution/expansion of the last set piece. There are more turrets here, and there are several new elements with which they combine. The basic setup is the same: the player needs to get into cover and then slowly work Freeman around each corner to defeat the turrets. The trip-laser is also nearly unavoidable but for completely different reasons. Where earlier the trip-lasers were set up to cover the entire passage, this time the trip-laser is easy to jump over, but that's not going to help.
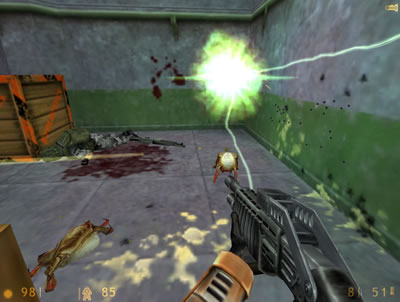
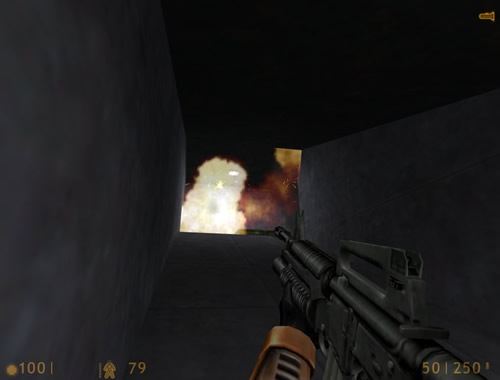
When Freeman enters the first cover location, two Vortigaunts will teleport in one-by-one directly behind him, which is a classic evolution of the previous set piece—an upgrade from Headcrabs to Vortigaunts. Without knowing beforehand that they're coming, it's almost impossible to stop them before they trip the laser and activate all the turrets. The designers were kind in that they accounted for a panicked reaction to the teleport, and placed two explosive barrels behind the Vortigaunt spawn. The explosion that kills the teleporting Vortigaunts is actually part of the descriptor mechanism for the room. In the center of the room there's another set of explosive barrels which can be used to disable the middle turret without exposing Freeman to fire.
Two explosions into the set piece, it should be clear that this set piece is all about triggering explosions (or just generally killing enemies) from behind safe cover. The player has recently picked up grenades, and this is the perfect time to use them, bouncing them off the walls or pillars to hit the turrets The two rear turrets aren't immediately dangerous because they're behind indestructible crates, but the confined space and height differential make them perfect targets for more bounced grenades thrown from above or through the small cracks in the crates.

If the player does choose to use grenades (instead of guns, which are effective from behind cover), the only really difficult part of this is learning the physics and making the throws before running out of grenades.
Segment 2: Architecture as Cover
The second segment of the cover theme pushes the player's ability to interpret cover by removing object cover and offering architectural features that serve the same purpose more subtly. Object cover does not disappear completely during this segment, nor does it ever vanish from the game, but it's less clear in later set pieces what is and isn't cover.
Most of this cover looks like ordinary walls and pillars; i.e., the kind of "cover" players might find in Quake or Doom. There are several important differences in both quality and quantity, however. In Quake, an enemy might chase the player character from one arena, down a straight hallway into another arena. There's no place to stop; everything is done by kiting and strafing. When there’s cover in Quake, it’s often an accident of the level design. In Doom, the player can make cover out of the terrain, but only because the enemies are slow and usually have a simple herd AI. In Half-Life, the enemies will act as individuals, shooting at medium range, charging at the player, and lobbing grenades. The player doesn't know what to expect, and as such, he or she can use the cover to buy time.
Half-Life set pieces are, to a certain extent, puzzles to be solved; cover is one of the pieces of that puzzle. In Doom and especially in Quake, the player has to start running as soon as the enemies aggro. By ducking into the first piece of cover available, the player gains a little bit of time with which he or she can look out on the rest of the set piece and plan the next move. Because the enemies in a Half-Life set piece aren’t usually in a herd, it’s actually possible to isolate certain enemies rather than take on the whole set piece at once. In the first segment, we saw how the first aspect of cover discipline was not panicking. The second aspect of cover discipline, which emerges here, is strafing around the corner of a piece of cover to create the most advantageous angle of fire. The right angle can cut down the number of enemies that can fire on Freeman while still keeping a few in sight to pick off. Especially in the second half of this segment, we’ll see lots of geographically large set pieces that the player can cut into smaller sections by using cover properly. Mostly, the player can use the same one or two pieces of cover for the entire set piece, so we haven’t yet reached point-to-point cover. In the next segment, the player will have to use several pieces of cover in sequence, but here the player mostly has to edge out a bit in one or two spots.
Cover descriptors are a bit scarcer in this segment and more subtle, although they do appear more than once. The left-hand hallway in set piece 5-3 can only exist for one reason—because the player should use it to get a different angle on the enemy in the back of the set piece. That’s a descriptor, although it’s a bit unusual. The barnacles in set piece 5-4 will eat enemy marines, and so serve as a kind of descriptor too, telling the player to simply stay away from the enemy’s line of sight and let the infighting do the rest. Laser trip-mines, making their first meaningful appearance in the player's arsenal, serve as an unusual descriptor for set piece 7-2, calling for their own use in the narrow halls of the surrounding area. None of these are as clear or as definitive as the cover descriptors of the first segment, but they do give shape to the set pieces they occupy.
SET PIECE 5-3: First Marines
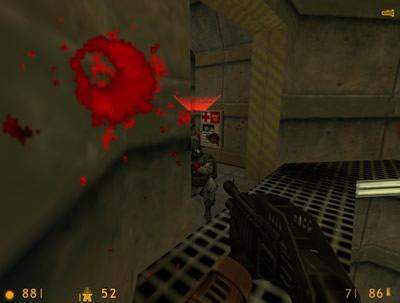
The purpose of this set piece is to introduce the next evolution in enemy type: the HECU marine. Up until now, the cover set pieces have been based around stationary turrets or small handfuls of alien enemies, none of which present a particularly complex threat. The turrets do a lot of damage, but they can't move. The aliens can do damage and have a decent amount of HP, but their AI doesn't account for cover well, so it's easy to out-think them. The HECU marine is both highly mobile and (relative to the rest of the enemies in the game) highly intelligent. The difference in intelligence and speed becomes clear very quickly in this set piece.

There are two descriptors here at the very beginning that explain the use of cover and terrain. The first is the marine shooting down on the scientists from the catwalk above. This tells the player to use both the ceiling and the boxes as cover, and not to run out into the open. Doing this, however, will make it surprisingly difficult to actually kill the marine above as he dodges away. The necessity of the cover will become clear when a marine with no helmet will start charging, and will quickly stick his gun around the large crate at the end and start firing on Freeman from close range. It's very difficult to see him before he's already at close range, and so the easy answer is to shoot the explosive barrels on the right—after all, the player just did this in the last set piece a few minutes earlier. The marine’s fire may incidentally detonate these anyway.
The first half of the set piece is about how, even with cover, the intelligence and speed of the marines makes them dangerous enemies at close range. The second half of the set piece is about the difficulty of fighting them at range. This is where the explosive barrels come into play; the explosion does a great job of eliminating the charging marine, but it leaves Freeman totally exposed. It will quickly become clear to the player that the marines are still dangerous at long range, and the lack of cover is a real problem. There's an answer to this, though, in the level design. The left-hand path that had been partially blocked is now open, and provides an ideal place to hide from enemy fire.

From the aperture at the end of the left-hand passage, the player can get a very different read on the back half of the set piece. The first thing to notice is that the rear marines are definitely not charging; they're just firing from afar, although they do move laterally. Standing to the side, it's possible to see through the many pillars and boxes and get a few shots off with the element of surprise. This passage also takes Freeman a lot closer to those mid-range boxes so that he doesn't have to run through enemy fire for a prolonged time. There's no easy way to beat the rear marines—the explosive barrels aren’t placed near them—but by avoiding the center firing lane and using the boxes and pillars as cover, Freeman can close the distance and take them out one at a time.
As a historical note I want to point out how, to players accustomed to Doom and Quake, this set piece would have been absolutely astonishing. The enemies of Doom and Quake—and even shooters as far back as Space Invaders— never had the combination of intelligence and speed that the HECU marines do. There were plenty of enemies in Quake who would move quickly and charge at the player while firing, but none of them ever knew how to use cover. Moreover, this fight features marines with various behaviors. Some of the marines charge, while some fire at long range (although they do draw closer over time). In the days of Doom, this would have required two totally different types of enemies, but the HECU marine is more versatile. What's more, it was rare for single-player set pieces to mix up high and low enemies like Half-Life does, but it seems completely natural here. Since Half-Life came out, all of these things have become common to the point of seeming generic, but back in 1998, this set piece marked the beginning of a series of incredible shooter experiences.
SET PIECE 5-4: Above
For its level design features, this set piece belongs in the cover theme, and yet because of the way it operates (as a large battle with enemy factions fighting each other), it could almost be in the arena theme. There's meaningful cover in several locations, although there isn't a clear descriptor mechanism like a destructible object or an unusually high source of damage to be found. The important feature here is the presence of the barnacles all over the room.
Because the barnacles do not dictate movement or how to use cover, they're not really descriptors. Instead, they serve a different purpose. As you can see, the barnacles can and will kill several marines while they attempt to fire on Freeman. Before Half-Life, infighting between unrelated factions was uncommon in videogames. In fact, one of the common complaints made by reviewers of action games in the 1990s was that enemies were not subject to the same rules the player's avatar is. Enemies could walk through lava or move through fields of friendly fire without taking any damage. This set piece shows the player how that's not true for Half-Life; enemies are subject to the same damage and physics as Freeman is, and the Xen monsters will fight the HECU troops. The designers never have to explain it; the game simply demonstrates the fact in a clear way.
Once the enemies have thinned each other out, the player still has to be careful about proceeding through the long middle stretches of the level. Even with the infighting, there are usually some marines left roaming around, and they can shoot down on Freeman such that using cover is difficult.
This is just another exercise in using the architecture of the level design wisely. The marines here won’t throw grenades like they will in the next set piece, so the cover is meaningfully protective. The player can’t really fire back until Freeman can get the high ground. Once the player can get to the high catwalk, the catwalk itself will provide all the cover the player needs to finish off any remaining enemies.
SET PIECE 5-5: Below
This set piece opens with an introduction to the astonishingly accurate grenade-tossing skills of the HECU marines. Immediately upon entering, the player will have to run quickly to avoid a barrage of grenades which the marines can launch from below with great accuracy (and at a bizarrely slow speed).
Want to read more? The rest of this section can be found in the print and eBook versions. In fact, the print version of this book has been significantly expanded and revised.
Introduction - Back | Next - The Cover Theme pt 2