Chapter 1: Quests One through Four
Quest 1 - Saving Marle (or, Dungeons for Dummies)
Stat of the Quest:The Stat of the Quest is a section dedicated to isolating one interesting statistic that shows an interesting and/or thematic design decision—with math! There isn’t much to say about quest one—at least not from a statistical standpoint. How about a strange little fact? Only two enemies in the game cast a slow debuff: the Naga-ette and Lavos. That is, the first enemy in a dungeon, and the very last boss.
For the most part, dungeons in Chrono Trigger never get much more complex than the Cathedral, but they do get bigger and they certainly get tougher. There are two zones in the Cathedral; the first room with adjoining balcony rooms to the right and left is the first section. With the weapons found in chests in the first section, the damage floor (minimum) for Crono and Frog’s attacks is around 25 and 35, respectively, even at a low level. Thus, the two of them will be able to take out the Diablos (50 HP) and Naga (60 HP) enemies in merely two hits.[1] If Frog and Crono do not finish it, one shot from Lucca ought to finish the Gnasher enemy nine out of 10 times. Most battles will be short and easy, just the way you’d expect them to be in a first dungeon.
The important thing about the first section is that if the player fights every group of enemies on screen once, it will earn the party 30 tech points. Not coincidentally, this will be just enough for Lucca to learn Flame Toss and Frog to learn Slurp and Slurp Cut. This is important because in the second room we are going to be introduced to one of the game’s enduring lessons: categories of enemies.
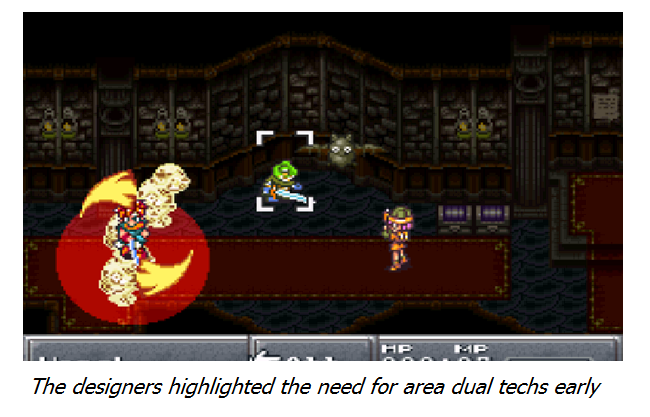
The primary lesson that Chrono Trigger teaches about combat with non-boss enemies is that there are different types of enemies that share behaviors and weaknesses. The Cathedral teaches the most basic division of enemies into categories; some enemies can be defeated by normal attacks, and some enemies must be defeated by special “tech” attacks. There are many different reasons why an enemy might fall into one group or the other, and we’ll see each of those reasons as we progress through the game, but the first thing for a player to know about an enemy is which group it falls into. In the second section of the Cathedral, the player is forced into combat with the Hench enemy. The Cathedral Hench is highly resistant to normal attacks, which prompts players to try using techs. In each Hench battle, the Henches tend to stand close together, making them a very easy target for Crono and Lucca’s new dual-tech attack, Fire Whirl. This attack will dispose of the whole group of Henches easily. The player learns two important lessons: (1) some enemies need to be killed with special attacks, and (2) dual-techs are very powerful.
Dungeon difficulty can be measured, in some cases, by the number of enemies that require tech attacks to defeat because the player will have to ration their MP, pick the right attacks, and even the right party combination. Not right now, however:Henches only make up 27% of the total number of enemies in the dungeon and can almost always be defeated by one or two dual techs. This number will go up a lot in later dungeons, when the player’s skill at choosing, using, and rationing tech attacks needs to be developed and tested.
The boss of the Cathedral, Yakra, introduces players to types of boss monsters. Attrition/spike bosses like Yakra generally work like this: the boss spends 2–4 rounds dealing small amounts of damage to every party member before launching a high-damage, single-target attack. There are variations on this theme that we’ll see in other bosses, but the attrition/spike design is used a few times. Although this design repeats, Chrono Trigger’s designers did a good job of making sure it would provoke a different response each time. In the case of Yakra, the player will probably resort to a dual-tech-and-heal strategy (X-Strike plus items), but this won’t be the case in every boss fight—not even others like this one.
Quest 2 - Action, Consequence and Deception
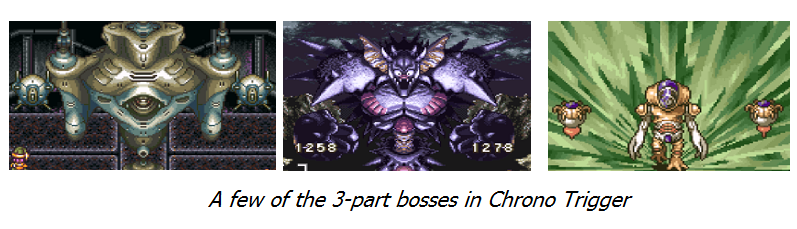
Stat of the Quest: Quest two introduces an important category of monster: the three-piece boss. Nine bosses (about 22% of all bosses, depending how you count repeats) are made up of three parts. Three out of these nine bosses feature regenerating parts. Five out of these nine bosses feature parts that can act independently of one another. Only one (the Lavos Core) features parts that can both regenerate and act independently. That’s an example of two categories of enemies coming together at the end of the game.
The most important part of the second quest is not its dungeon but the trial that precedes it. Both parts, however, perform the same deception. The goal is to convince a first-time player that they’re playing a different kind of game than they’re actually playing. To explain what this means, we’ll go in reverse order, starting with the dungeon because it is simpler.
Guardia prison is a confusing and somewhat open-ended dungeon that gives new players the impression that upcoming dungeons will be complex and have multiple options for dealing with them. This isn’t true. Guardia prison is the game’s only true maze. (Although the Blackbird seems like a maze, it’s laid out in a regular grid pattern. Even the dungeon called “Forest Maze” is nothing more than a straightforward walk with a couple of meaningless branching paths.) On first playthrough, the structure of Guardia Prison’s connected towers is confusing, and its exit is counterintuitively placed. There are two entirely different ways to get out of the dungeon, either by exploring or by simply waiting for rescue. The game never again offers that kind of choice. Crono is alone in this dungeon (unless you opt for rescue), and there will never again be a true solo dungeon. There are chests that the player can see but that they cannot seem to reach from their current position; this, too, will never be a feature of other dungeons. Finally, there are enemies that can be defeated outside of battle. This, as you might have guessed, never happens again.
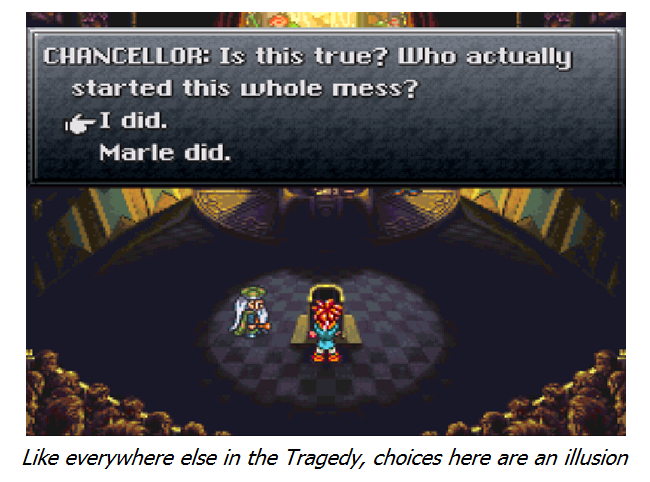
For toying with player expectations, the trial scene is even worse. The trial attempts to convince the player that he has far more choice and agency in the world than he actually does. First time players will almost certainly commit a number of errors at the Millennial Fair which the Chancellor will use against them. There’s the obvious, bright pink lunch that seems like an easy snack. There’s the option to convince Marle to sell her pendant.
For that matter, there’s the pendant itself. It’s a very easy mistake for a new player to make, grabbing the pendant first before talking to her. The one mistake almost every player makes is pulling Marle away from the candy store. How are you supposed to know that even one small move would be used in a trial later?
New players are meant to think that these kinds of small actions will be meaningful throughout the rest of the game—that their decisions matter. That would make a lot of sense for a game about time travel; decisions made in the past can affect the present and future. The Tragedy of the Entity does not actually operate like this. Not only are the player’s minor choices irrelevant, but the quests in the first half of the game are historically meaningless. The tricky thing is that players cannot see the lack of impact their choices have until after the Tragedy of the Entity is complete. The trial scene is, in a sense, the designers’ way of pulling the wool over the eyes of the player, preserving the shock of the realization until it is thematically appropriate.
Quest 3 - Meet the Antagonist
Stat of the Quest:Lead with art! By the end of this quest, the player is finished with 14% of the quests, and 14% of the battles (crazy coincidence, huh?). In that short span, the player has already heard 47.8% of the music tracks, seen 41% of the game’s map tilesets, and fought 34% of the game’s repeating enemy sprites.
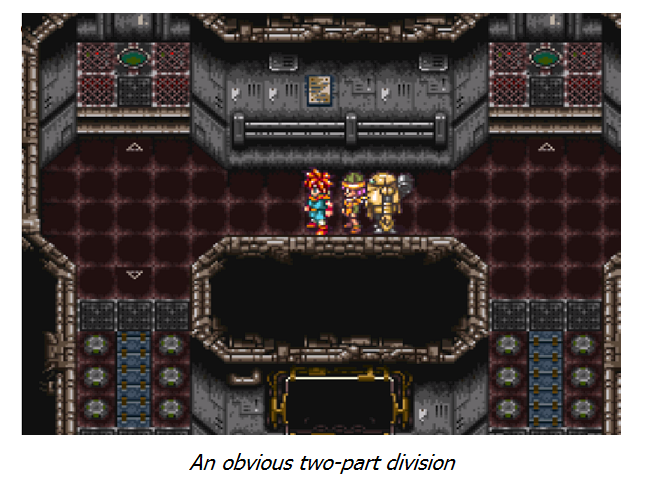
The third quest is, in a sense, inside-out. Most of the quests in the first half of the game feature two-part dungeons. A two-part dungeon is any dungeon that divides neatly into two sections with an opportunity to save and heal at the midpoint. Quest three features a two-part dungeon; it’s just that there happens to be a town in the middle of it. Neither Lab 16 nor the Info Center is terribly long or challenging. Combined, however, they make for a reasonably sized dungeon, and they have only one boss between them. Or consider it this way: there are exactly 20 battles and one boss to be had in the Cathedral. There are exactly 19 battles and one boss to be had between Lab 16 and the Info Center. In between, the player can visit Arris Dome to save and heal in the Enerton.
The boss of this quest introduces a new and common type, the three-part boss. It’s also one of the hardest bosses in the game, at least for new players who don’t figure out the boss’s primary behavior. The Guardian counterattacks with a high-powered, multi-target attack each time it gets hit—as long as both of its sidekicks are alive. Eliminate the sidekicks and it’s more or less helpless. In this, the player learns two lessons about future bosses. One, they learn how to face a tripartite boss; almost every three-part boss has one part that significantly weaker than the others.
The other lesson is about temporary or triggered vulnerability. This is a very prevalent feature in CT bosses. The Guardian does not possess the full characteristics of triggered vulnerability, but it does serve as a precursor to that mechanic because it is more vulnerable at some times than others. . Both Nizbels, Magus, the first Tyrano, the Retinite, and the last form of Lavos all benefit from some version of temporary/triggered vulnerability. We’ll see more about that particular monster type in quest six.
Quest 4 - Four's a Crowd
Stat of the Quest:Chrono Trigger doesn’t really have many “mini” or “mid-bosses,” but the sequence of battles introduced in this quest can sometimes serve the same purpose as a mid-boss would. Of the four proper sequences of battles, three have cumulative stats that are close to boss levels. The first sequence of battles at the Factory Ruins sees the player fight a bunch of Debuggers and Proto 3s, whose total HP is 1488. If you multiply that by 2/3 (because only 2/3 of the party actually fights the boss, with Robo out) you get 992. The R-Series boss has a total HP of 900. In the Ocean Palace elevator sequence, the player fights various monsters totaling 8490 HP. The Golem Twins each have 7000 HP (and the whole point of the battle is figuring out how to attack them both at once because of their shifting abilities). Last and most interesting, the sequence beginning the Geno Dome throws enemies totaling 18432 HP at the player. Atropos (the closest thing the game has to a classic mid-boss) has 6000 HP, and fights Robo alone. Multiply that by three for the full party, and you get 18000. In each case, it’s a pretty close substitute for an extra boss, although it’s tactically different for the sake of variety.(2)
The fourth quest is much shorter than the third, although the fourth dungeon can feel longer than the third for a few reasons. The quest starts with a somewhat ill-advised minigame: the jetbike race. There is not a lot of nuance to the bike race; the only real strategy is to try and bounce off Johnny as many times in sequence as possible. He moves to block the player in a straightforward manner, but the depth of field of the screen is hard to interpret, making it needlessly difficult to avoid collisions. Nor is the bike race deep on mechanical or meaningful level, so there isn’t much to say. Attempting to cross the mutant ruins of Lab 32 is more difficult and not rewarding. The bike race is the lesser of two mediocre options.
The dungeon of the fourth quest, on the other hand, is quite interesting for a variety of design reasons. The foremost reason is that there is a new character. The player’s choice of party composition creates a tactical decision. The player must decide whether to bring Marle (for more healing) or Lucca (for more firepower) to the dungeon, alongside Robo and Crono. Even the framing of this decision is meaningful. In many RPGs, the player suddenly has to choose a whole party from scratch. In Chrono Trigger, the player only gets to decide how to fill one slot. This limits the player’s choice, but it helps inexperienced RPG players to understand the meaning of party composition without having to make too many decisions at once. After this quest, the player plays two quests with greater choice, so the gentle introduction to the concept makes a lot of sense.
Want to read more? The rest of this section can be found in the print and eBook versions. In fact, the print version of this book has been significantly expanded and revised.